obj _idRenderData
When building custom objects, using the _idRenderData strings after the obj is essential for controlling the placement of items in game.
Here are the ones that display uniquely (as of 12/20/2024) with examples of how they are displayed.
Keywords:
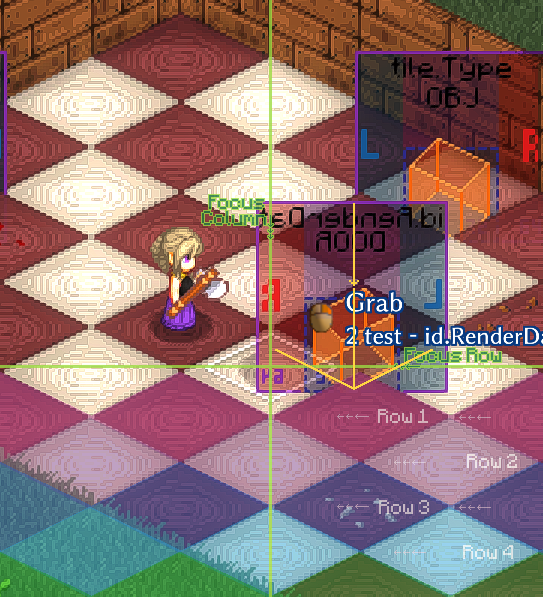
- Focus Column: This is the main column on the ground grid that the item (the light diamond for placing items) is being placed on.
- Focus Row: This is the main row on the ground grid that the item is being placed on.
- Object Center (obj center): These three lines, making a kind of downward arrow, shows where the object sits on the ground grid by default, without any modifiers of any kind.
- Clipping Row: This is the row on the ground grid that clips the edge of the item, giving it the appearance of sitting on the ground. Each row is numbered from the placement down.
- Regular: How the item is placed by default.
- Alternate: When you rotate or flip the item, how it displays.
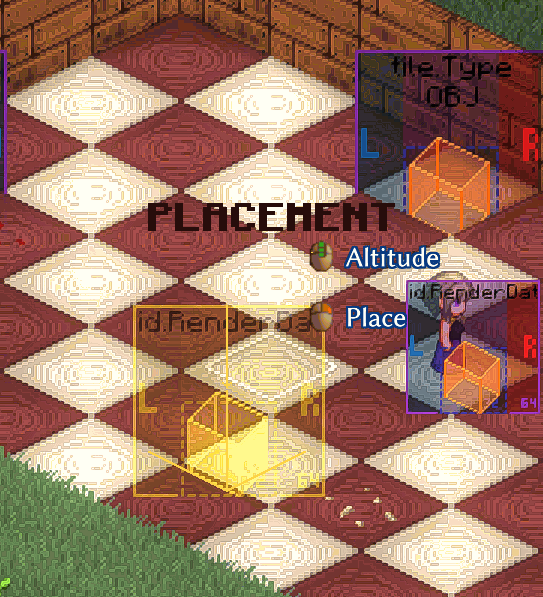
This example uses a 64 x 64 pixel image as a reference.

This reference item shows the left, right, and center of the image, as well as a smaller 32x32px grid for showing smaller items, and an offset cube to show the general floor positions.
For reference, Elin uses an angle of 2 pixels horizontally to 1 pixel vertically for the blocks.
@obj ceil
| ceil | notes |
|---|---|
 |  |
Obj goes up 2 rows, aligns obj center.
@obj door
This is one of the most commonly used settings, so understanding it is important.

| door-regular | notes |
|---|---|
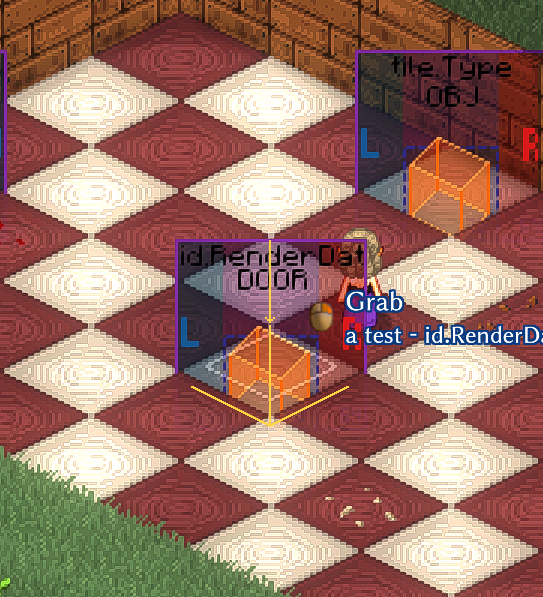 |  |
| Obj drops down slightly from the focus cell, aligns the obj center with the focus center | Clips on Row 1 |
| door-alternate | notes |
|---|---|
 |  |
| Obj raises up a bit, aligns obj center with the column to the right of the focus | Clips on Row 1 |
Overview:

@obj doorcurtain
| doorcurtain | notes |
|---|---|
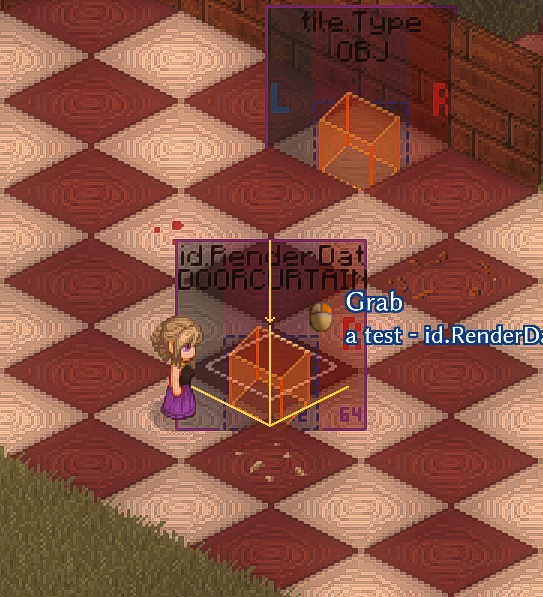 |  |
| Obj drops down slightly, aligns the obj center with the focus | Clips on Row 2 |
@obj doorframe
This placement gave me the most nightmares and inspired this whole endeavor. I still don't quite understand why it handles the way it does.
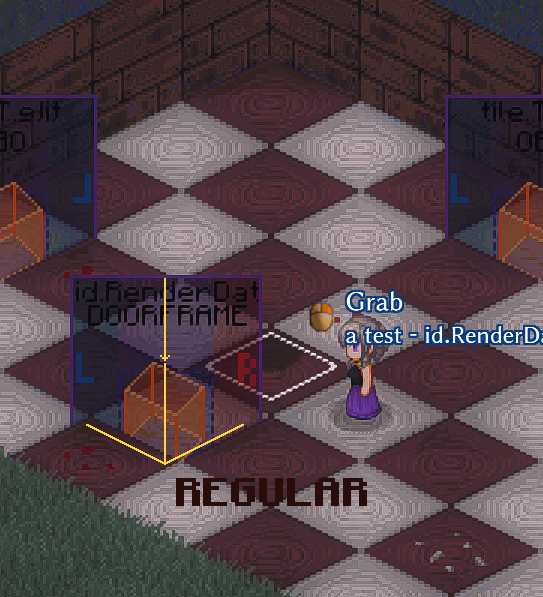
| doorframe | doorframe-alternate |
|---|---|
 |  |
| Obj drops by 1 row and moves left by 1 column | Same placement but slightly raised up |
| Both clip on Row 1 | Both clip on Row 1 |
@obj eq
This is designed to be handheld items so it sets up nicely on the sprite, so not really used for objects unless you have interesting use cases.
| eq-regular | eq |
|---|---|
 |  |
| Obj shifts to the left by 16px and up a little bit | Both clip on Row 1 |
@obj flat
| flat | notes |
|---|---|
 |  |
| Obj drops down to the middle of the focus on both horizontal and vertical | Clips on Row 1 |
@obj hangboard
I wasn't expecting this one to be as interesting as it is, and has a lot of potential, but be aware of where the clipping happens.
| hangboard | hangboard-placement |
|---|---|
 |  |
| hangboard-regular | hangboard-alternate |
|---|---|
 |  |
| Obj shifts to the left by 16px, drops down to be 'on' Row 2 | Obj shifts up slightly but keeps the center the same as regular |
| Clips on Row 3 | Clips on Row 1 |
@obj hangroof
| hangroof-placement | hangrood-notes |
|---|---|
 | 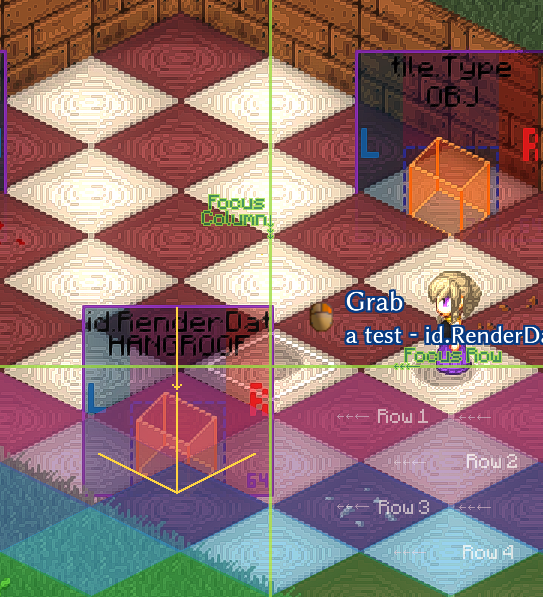 |
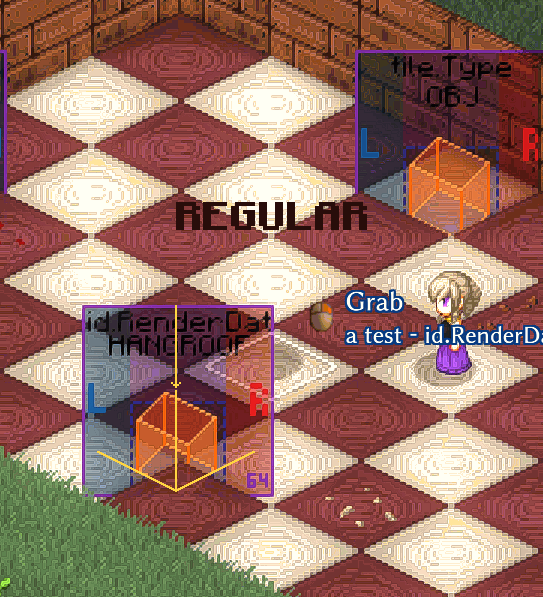
| hangroof-regular | hangroof-alternate |
|---|---|
 |  |
| Obj shifts to the left by 1 column, down by 2 rows | Obj shifts to the left by 16px, down by 1 row |
| Clips on Row 3 | Clips on Row 2 |
@obj tall
| tall | notes |
|---|---|
 |  |
| Obj shifts up by 6px or so | Clips on Row 1 |
@obj vine
| vine | notes |
|---|---|
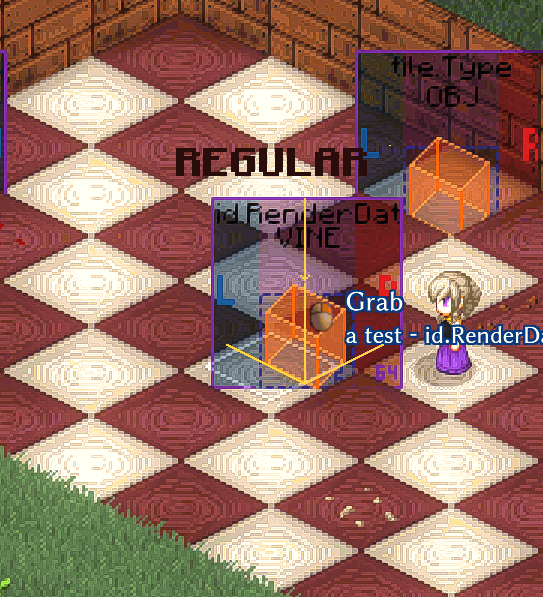 | 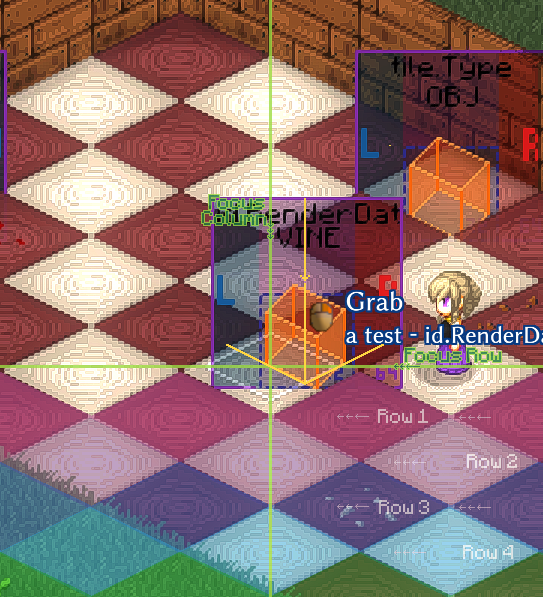 |
| vine-regular | vine-alternate |
|---|---|
 | 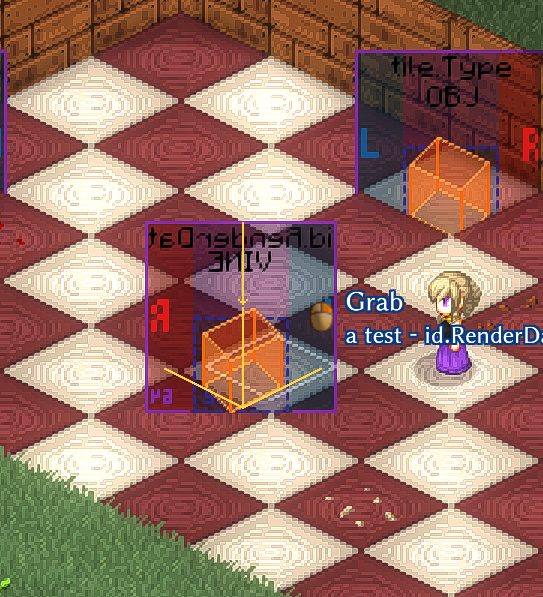 |
| Obj shifts right by 8px or so, and up by 8px or so | Obj shifts left by 8px or so, down by 8px or so |
| Clips on Row 1 | Clips on Row 2 |
One final note:
For your own items, to give you an idea of where they are positioned, you can overlay this image on a screen shot to help get an idea of where it is and where it's going to help tweak your designs.
![]()